Mastering the Art of Daylily Cultivation: A Comprehensive Guide to Thriving Blooms
- omarlawn2020
- Jul 14, 2025
- 4 min read
Growing daylilies can be one of the most enjoyable experiences for any gardening enthusiast. With their vibrant blooms and minimal care requirements, these perennial plants can infuse your garden with color and beauty. This guide will walk you through the practical steps needed to successfully cultivate these stunning flowers and ensure that they flourish in your garden.
Understanding Daylilies
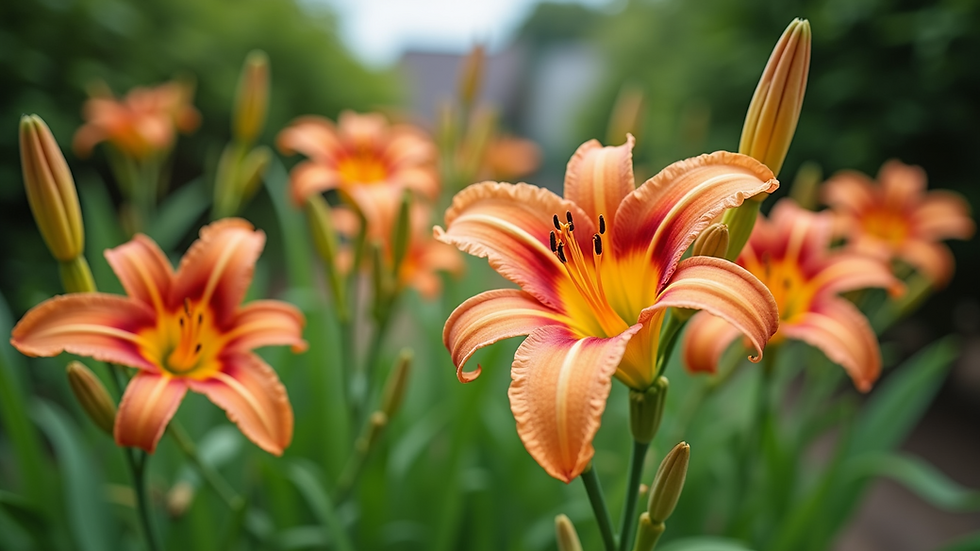
Daylilies (Hemerocallis spp.) are among the top choices for gardeners due to their resilience and beauty. Originally from Asia, daylilies adapt well to various climates and soil types. While each bloom lasts just one day, daylilies produce many flowers in succession, creating a breathtaking visual display.
For instance, plant enthusiasts can choose from over 80,000 registered daylily cultivars. Whether you're drawn to deep reds, soft yellows, or vibrant oranges, the options are nearly limitless. This vast selection makes daylilies appealing for all gardening styles—whether formal or natural.
Choosing the Right Location
Choosing the perfect location for your daylilies is crucial to their success. These flowers thrive in full sun but can tolerate partial shade, so a sunny spot that receives at least six hours of direct sunlight per day is ideal.
It's vital to ensure the soil drains well. Daylilies can suffer from root rot when planted in waterlogged conditions. If your garden contains heavy clay, consider mixing in organic matter like compost to enhance drainage and soil fertility. We know that daylilies can thrive in soil with a pH of 6.0 to 6.8, so keep that in mind when preparing.
Preparing the Soil
Proper soil preparation is essential before you plant your daylilies. Start by checking the pH level, aiming for around 6.0 to 6.8. Improving the soil with compost or well-rotted manure enhances fertility and structure, making it a better environment for root growth. Studies show that plants grow over 30% better in enriched soil.
Additionally, tilling to a depth of at least 12 inches creates a loose environment that allows roots to spread freely—a crucial factor for daylilies, known for their extensive root systems.
Planting Daylilies
Once the soil is ready, it’s time to plant your daylilies. The best seasons to plant are early spring or early fall, giving the plants time to settle in before seasonal extremes.
Dig a hole twice as wide as the root ball and at the same depth. Position your daylily such that the crown—where roots meet leaves—sits slightly above the soil level. This positioning encourages air circulation around the crown to prevent rot. After placing the plant, backfill it with soil and water thoroughly. Adding a layer of organic mulch helps retain moisture and suppress weeds, contributing to better growth.
Watering and Fertilizing
While established daylilies are relatively drought-tolerant, they need consistent watering during their first year. Water deeply once a week, and during especially dry spells, increase this frequency to keep the soil evenly moist. Research indicates that plants with consistent moisture are 40% more likely to produce abundant blooms.
For fertilization, apply a balanced fertilizer in early spring—this will provide essential nutrients for growth and blooming. Avoid high-nitrogen fertilizers, which may lead to lush foliage at the expense of flowers.
Pruning and Maintenance
Regular maintenance ensures your daylilies stay healthy and vibrant. After blooming, pinch off spent flowers at the base to encourage new growth. Pruning not only enhances the plant's appearance but also promotes a stronger comeback in the next blooming season.
In the fall, cut back the foliage to about six inches above the ground. This practice helps prevent diseases and prepares your plants for the winter dormant period.
Controlling Pests and Diseases
While daylilies are generally tough, they can face challenges from pests and diseases. Common culprits include aphids, spider mites, and slugs. Inspect your plants regularly and deal with infestations quickly using organic methods or safe, homemade solutions.
Daylilies can also suffer from fungal diseases like rust or crown rot, especially in poor conditions. To prevent these issues, ensure adequate airflow, avoid overhead watering, and keep enough space between plants.
Propagating Daylilies
One of the appealing aspects of daylilies is their easy propagation. Dividing and replanting your daylilies every three to five years not only promotes blooming but also revitalizes the plant's health.
To divide daylilies, wait until they are dormant in late fall or early spring, just before new growth starts. Carefully dig up the clump and separate the roots using a spade or garden fork, ensuring each division has three to five fans. Replant these divisions immediately to reduce stress on the plants.
Final Thoughts
Growing daylilies can be an enriching journey for gardeners of all skill levels. By following this comprehensive guide, you can ensure that your daylilies not only survive but thrive, adding a vibrant touch to your garden for years to come. Remember, a little care goes a long way, and with basic maintenance, you'll be rewarded with a stunning array of blooms that change with the seasons. Enjoy your gardening adventure!
🌿 Connect with Omar C Eco-Friendly Lawns
At Omar C Eco-Friendly Lawns, we believe that every garden can be a sanctuary—lush, sustainable, and bursting with life. Whether you're inspired by the resilience of daylilies or dreaming of a custom planting plan, we're here to help you transform your outdoor space with care and expertise.
If you’re ready to bring vibrant color and eco-conscious design into your landscape, let’s make it happen—
📧 Reach out at omarlalwn2020@gmail.com or
📞 Call/Text 708-676-7646 to schedule a consultation.
Let's grow something beautiful together.


Comments